Programming Arduino Next Steps: Going Further with Sketches
Introduction
Arduino is often the first step into embedded programming because it makes hardware and software work together with relatively little complexity. A beginner can connect an LED, write a short sketch, upload it to a board, and immediately see a physical result. 🚀
But after learning variables, setup(), loop(), digital I/O, analog inputs, and simple delays, an important question appears:
What comes next?
The answer is not simply learning more Arduino commands. The real next step is learning how to write better sketches—programs that are organized, responsive, reusable, easier to debug, and capable of controlling several hardware components at once.


Moving beyond beginner sketches means changing the way you think about embedded systems. Instead of writing one long sequence of instructions, you begin designing a small software system. You learn how functions communicate, how libraries extend capabilities, how timing can be managed without blocking the processor, and how sensor data can influence actuators.
This article explores the next stage of Arduino programming for students, hobbyists, engineering learners, and professionals who want to move from simple experiments toward practical embedded projects. 🔧💻
Background Theory
From simple sketches to embedded systems
An Arduino sketch is essentially a program designed to interact with physical hardware. Unlike conventional desktop software, an embedded sketch operates within strict constraints involving processing power, memory, timing, electrical interfaces, and physical inputs.
A simple beginner project might follow this pattern:
Read → Process → Output
For example, a temperature sensor provides information, the Arduino processes it, and an LED or display communicates the result.
More advanced systems expand this concept:
Input → Filtering → Decision → Control → Communication → Monitoring
This architecture is much closer to the way professional embedded systems are designed.
Why programming structure matters
A sketch containing twenty lines of code may work perfectly. However, a project containing several sensors, motors, displays, communication interfaces, and safety conditions can quickly become difficult to maintain.
Good Arduino programming therefore focuses on:
- Modular functions
- Meaningful variable names
- Reusable code
- Non-blocking timing
- Libraries
- State management
- Error handling
- Serial debugging
- Hardware abstraction
- Efficient memory usage
🧠 The goal is not to write more code. The goal is to write code that remains understandable when the project becomes larger.
Definition
What does “going further with sketches” mean?
Going further with Arduino sketches means progressing from basic hardware experiments to structured embedded software capable of managing multiple tasks and hardware interfaces reliably.
This includes learning techniques such as:
- Creating custom functions
- Organizing code into logical modules
- Using arrays and structures
- Working with external libraries
- Managing timing with
millis() - Reading sensors efficiently
- Controlling multiple outputs
- Communicating through serial interfaces
- Designing finite-state systems
- Debugging complex behavior
The difference between beginner and advanced sketches
A beginner sketch often focuses on making one component work.
An advanced sketch focuses on making the complete system behave correctly.
For example, a beginner may create a project where an LED flashes every few seconds.
An advanced version might simultaneously:
- Monitor a sensor
- Control an LED
- Update an LCD
- Record events
- Communicate with another device
- Detect abnormal conditions
- Continue operating while performing all these tasks
That difference represents an important transition in Arduino engineering. ⚙️
Step-by-Step Explanation
Step 1: Organize the sketch
Start by dividing the program into logical sections.
A useful structure is:
Configuration
↓
Global variables
↓
Initialization
↓
Input processing
↓
Decision logic
↓
Output control
↓
Communication
This organization makes debugging much easier.
Step 2: Replace repeated code with functions
If the same operation appears multiple times, consider creating a function.
For example:
void turnOnWarningLED() {
  digitalWrite(LED_PIN, HIGH);
}
Then the main program can call the function whenever necessary.
Functions improve readability and reduce duplication.
Step 3: Learn non-blocking timing
One of the most important next steps is understanding why excessive delay() calls can create problems.
Consider a project that needs to:
- Blink an LED
- Read a sensor
- Check a button
- Update a display
A long delay can prevent the Arduino from responding to the other tasks during that period.
Instead, timing can be managed with millis().
A simplified approach looks like:
if (millis() - previousTime >= interval) {
  previousTime = millis();
  updateDevice();
}
Now the processor can continue handling other operations.


Step 4: Separate inputs from decisions
Avoid mixing every sensor-reading operation with every output operation.
A cleaner design might use:
readSensors()
       ↓
processData()
       ↓
makeDecision()
       ↓
updateOutputs()
This makes the project easier to test and expand.
Step 5: Use libraries intelligently
Arduino libraries provide ready-to-use functionality for many devices.
Libraries can simplify communication with:
- Displays
- Sensors
- Motors
- Wi-Fi modules
- Bluetooth modules
- SD cards
- Real-time clocks
- Keypads
However, blindly adding libraries is not always a good strategy.
Before installing a library, consider its documentation, memory requirements, compatibility, maintenance, and required dependencies.
Step 6: Add debugging
Serial communication is one of the simplest debugging tools available.
For example:
Serial.println("Sensor reading started");You can also display sensor values, state changes, errors, and timing information.
🔎 Debugging turns an invisible software problem into observable information.
Comparison
Beginner sketch vs advanced sketch
| Feature | Beginner Sketch | Advanced Sketch |
|---|---|---|
| Structure | Mostly linear | Modular |
| Timing | Often uses delay() | Frequently uses non-blocking timing |
| Functions | Limited | Extensive |
| Sensors | One or two | Multiple |
| Error handling | Basic | Designed explicitly |
| Libraries | Simple | Carefully selected |
| Debugging | Minimal | Serial/logging strategies |
| Scalability | Low | Higher |
| Maintenance | Difficult as project grows | Easier |
| Hardware interaction | Simple | Coordinated |
Arduino sketch vs professional embedded software
Arduino provides an excellent learning environment, but professional embedded development can involve RTOS systems, hardware abstraction layers, formal testing, version control, continuous integration, and strict safety requirements.
Nevertheless, the fundamental programming principles are similar.
Good structure scales.
Diagrams & Tables
A useful architecture for advanced sketches
              ┌──────────────────┐
              │     Sensors      │
              └────────┬─────────┘
                       ↓
              ┌──────────────────┐
              │ Input Processing │
              └────────┬─────────┘
                       ↓
              ┌──────────────────┐
              │ Decision / Logic │
              └────────┬─────────┘
                       ↓
             ┌───────────────────┐
             │ Output Controller │
             └───────┬───────────┘
                     ↓
        ┌────────────┼────────────┐
        ↓            ↓            ↓
      Motor         LED         Display
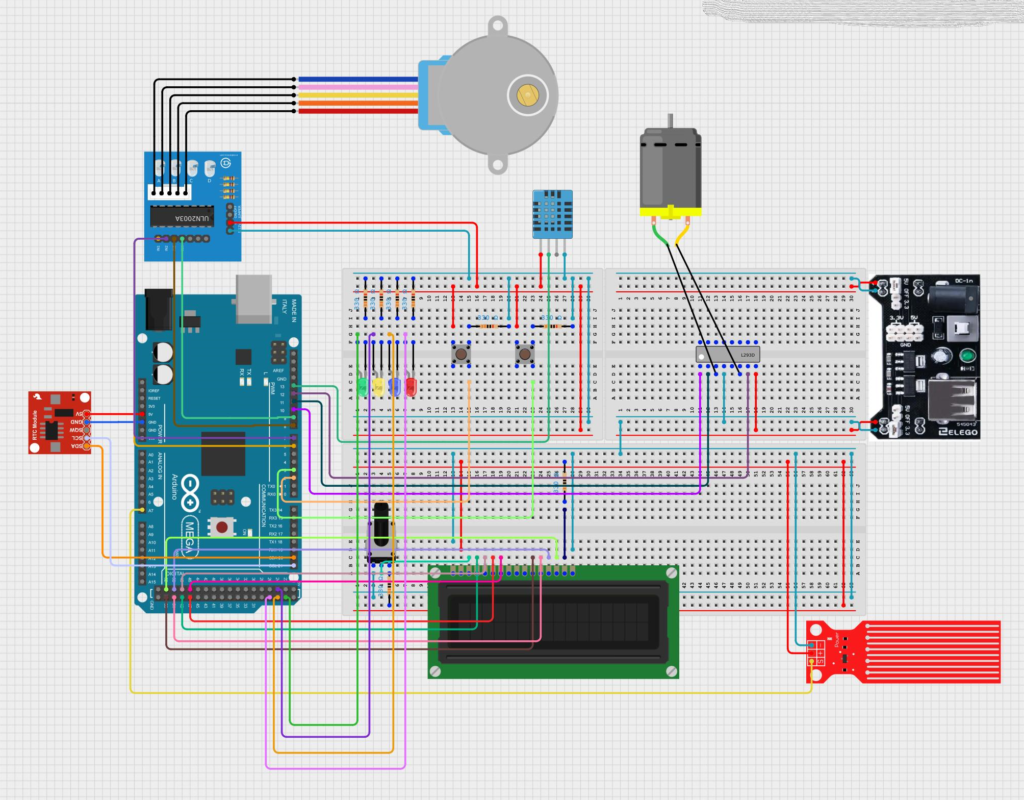
This architecture separates what the hardware reports from what the program decides and what the hardware does.


Useful programming techniques
| Technique | Main Purpose | Benefit |
|---|---|---|
| Functions | Divide operations | Better readability |
| Arrays | Store related data | Easier data processing |
millis() | Manage timing | Better responsiveness |
| Libraries | Reuse functionality | Faster development |
| Serial Monitor | Debugging | Easier fault detection |
| State machines | Manage operating modes | Predictable behavior |
| Constants | Define fixed values | Safer maintenance |
| Comments | Explain intent | Better collaboration |
Examples
Example 1: Smart room controller
Imagine an Arduino connected to a motion sensor, light sensor, LED strip, and temperature sensor.
A basic program might simply turn a light on when motion is detected.
A more advanced sketch can:
- Detect motion
- Determine whether the room is already illuminated
- Check temperature
- Control lighting
- Update a display
- Monitor button commands
The program becomes a small control system rather than a single sensor experiment.
Example 2: Automatic plant monitoring
A plant-monitoring system can use a soil moisture sensor, water pump, display, and warning LED.
The sketch can periodically check the soil condition and activate the pump only when appropriate.
An improved version can also detect abnormal sensor readings and prevent the pump from operating continuously.
🌱 This demonstrates an important engineering principle: software should protect hardware from incorrect conditions.
Example 3: Mini security system
A more sophisticated Arduino security project could combine:
- Motion detection
- Door sensors
- Buzzer
- Status LEDs
- Keypad
- Display
Instead of writing independent programs for every component, the sketch can manage several operating states:
DISARMED
   ↓
ARMING
   ↓
ARMED
   ↓
ALARM
   ↓
RESET
This is where state-machine thinking becomes extremely useful.
Real World Application
Industrial monitoring
Arduino-compatible platforms can be useful for prototypes that monitor environmental conditions, equipment status, or laboratory processes.
A prototype may collect readings from multiple sensors and communicate the information to another system.
Robotics 🤖
Robotics requires coordinated control.
A robot may need to:
- Read distance sensors
- Control motors
- Monitor battery conditions
- Receive commands
- Determine movement states
A well-structured sketch makes these simultaneous activities easier to manage.
Environmental monitoring
Engineers can use microcontroller prototypes to collect information about temperature, humidity, air quality, water conditions, or other environmental parameters.
Educational engineering laboratories
Advanced Arduino sketches are particularly useful in universities and technical training because students can connect programming concepts with physical behavior.
Instead of simply seeing output on a computer screen, students can observe motors, sensors, displays, and communication devices responding to software.
Common Mistakes
Using too many delay() statements
A delay can make a program appear simple, but excessive blocking can prevent the Arduino from responding quickly to other events.
Better approach: use non-blocking timing where appropriate.
Creating one giant loop()
A huge loop containing hundreds of lines becomes difficult to understand.
Better approach: divide responsibilities into functions.
Using unclear variable names
Names such as:
int x;
int y;
int z;
may work during experimentation but become confusing later.
Names such as:
sensorValue
motorSpeed
warningState
make the program much easier to understand.
Ignoring memory
Small Arduino boards have limited RAM and program memory.
Large strings, excessive global variables, unnecessary libraries, and inefficient data structures can cause unexpected behavior.
Assuming sensors are perfect
Real sensors can produce noisy, missing, or unexpected readings.
Advanced sketches should consider abnormal input conditions.
Challenges & Solutions
| Challenge | Practical Solution |
|---|---|
| Program becomes too large | Split functionality into modules |
| Multiple tasks interfere | Use non-blocking timing |
| Sensor readings fluctuate | Apply appropriate filtering |
| Difficult debugging | Add structured Serial messages |
| Memory problems | Reduce unnecessary data and libraries |
| Complex behavior | Use state machines |
| Repeated code | Create reusable functions |
| Hardware failures | Add validation and fallback behavior |
Managing complexity
The biggest challenge is often not Arduino itself.
It is system complexity.
When five components become ten components, interactions between them can multiply rapidly.
A useful engineering strategy is to build incrementally:
Component A
↓
Component B
↓
A + B
↓
Component C
↓
A + B + C
↓
Complete System
Test each stage before moving forward. 🛠️
Case Study
Smart greenhouse controller
Consider a prototype greenhouse controller.
The system contains:
- Temperature sensor
- Humidity sensor
- Soil sensor
- Ventilation fan
- Water pump
- Status display
- Warning indicator
A beginner approach might write one continuous program that reads everything and immediately activates outputs.
A better engineering approach divides the system into independent tasks.
Sensor task
The program periodically collects sensor information.
Decision task
The controller determines whether ventilation or irrigation is required.
Output task
The system activates the appropriate hardware.
Monitoring task
The display reports system status.
Safety task
The program detects abnormal conditions, such as impossible sensor readings or an unexpectedly long pump operation.
This architecture makes future upgrades easier.
For example, a wireless communication module could later be added without completely rewriting the control logic.
The important lesson is that good software architecture makes hardware expansion easier.
Essential Tips
Start small, then expand
Do not build a ten-sensor project immediately.
Build one feature, test it, document it, and then add the next feature.
Use meaningful constants
Instead of scattering pin numbers throughout the program, define them clearly.
const int STATUS_LED = 13;
const int SENSOR_PIN = A0;
This makes hardware changes much easier.
Keep hardware and logic separate
Try to make your decision-making code independent from specific pin operations.
This improves portability.
Use version control
For serious projects, Git can be extremely valuable.
It allows you to track changes and return to earlier working versions.
Comment the “why”
Comments are most useful when they explain why something unusual is happening.
Avoid filling the program with comments that merely repeat what the code obviously does.
Test failure conditions
Do not test only the ideal situation.
Ask:
- What happens if the sensor disconnects?
- What happens if a button remains pressed?
- What happens if communication stops?
- What happens if the motor cannot move?
- What happens after restarting the board?
⚡ Reliable engineering considers failure—not just success.
Learn the hardware interface
Going further with sketches also means understanding interfaces such as:
- Digital I/O
- Analog inputs
- PWM
- I²C
- SPI
- UART/Serial
Understanding these interfaces allows you to select and integrate more advanced components.
FAQs
What should I learn after basic Arduino programming?
Focus on functions, arrays, libraries, millis(), Serial debugging, state machines, communication protocols, and modular programming.
Is delay() always bad in Arduino sketches?
No. delay() can be perfectly acceptable for simple programs. The problem appears when blocking delays prevent the system from responding to other tasks.
Why is millis() important?
millis() allows a sketch to measure elapsed time while continuing to execute other parts of the program. This is useful for responsive multi-task projects.
Should I use Arduino libraries in advanced projects?
Yes, when appropriate. Libraries can save development time, but you should understand their memory usage, dependencies, compatibility, and behavior.
What is a state machine?
A state machine organizes software around defined operating states and transitions between them. It is particularly useful for robots, automation systems, alarms, and user interfaces.
How can I debug an Arduino project?
Start with the Serial Monitor. Print important sensor values, operating states, events, and error conditions. For more advanced systems, structured logging and external debugging tools can also help.
Can Arduino programming lead to professional embedded development?
Absolutely. Arduino provides a friendly platform for learning embedded concepts. As your skills progress, you can move toward more advanced microcontrollers, professional IDEs, RTOS platforms, communication systems, and embedded software architectures.
What is the most important next step?
Learn to think in terms of systems rather than individual components. Instead of asking “How do I turn this LED on?”, start asking “How should the entire system behave under normal and abnormal conditions?”
Conclusion
Programming Arduino beyond the beginner level is not about memorizing hundreds of commands. It is about developing an engineering mindset. 🧠⚙️
The transition begins when you stop treating a sketch as a collection of instructions and start treating it as a small embedded software system.
Functions make programs modular. Libraries extend capabilities. Non-blocking timing improves responsiveness. State machines simplify complex behavior. Debugging makes hidden problems visible. Careful memory management improves reliability.
These techniques can transform a simple Arduino experiment into a sophisticated prototype capable of controlling sensors, motors, displays, communication modules, and automated processes.
For students, this progression builds a strong foundation in embedded programming. For professionals, it provides practical experience with concepts that appear throughout modern control and embedded engineering.
🚀 Your next Arduino project should not simply do more—it should be designed better.
That is the real meaning of “Going Further with Sketches.”